Screenshots: Everything Is Right At Your Fingertips
Resource Viewer
Use the left side navigation pane to switch between the Resource Editor and the File Scanner.
From the toolbar you can quickly save your changes, save or delete/restore a selected resource, copy a selected resource to the clipboard, add an item into the resource section, search through the resource tree (useful for searching RCData content), and see properties of a selected resource (Language ID, Type, Raw size, etc). Several tabs give you the possibility to switch from the default view to HEX, as well as text.
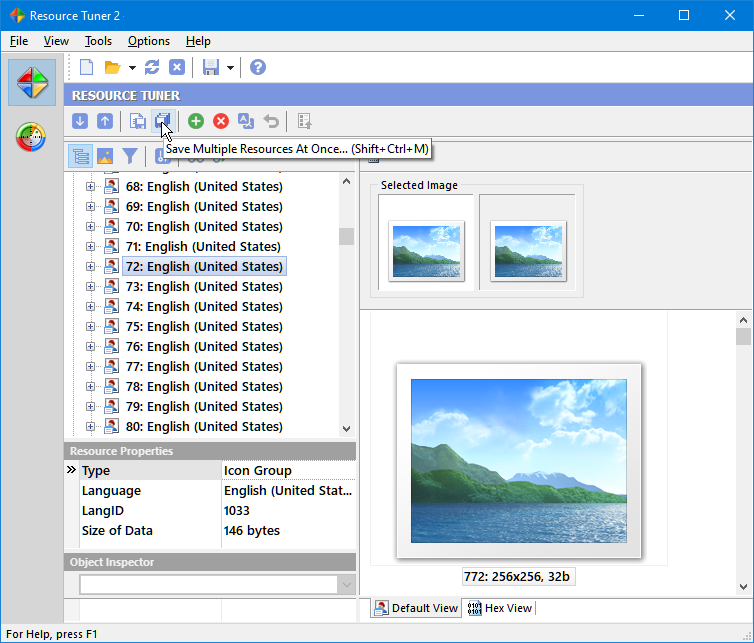
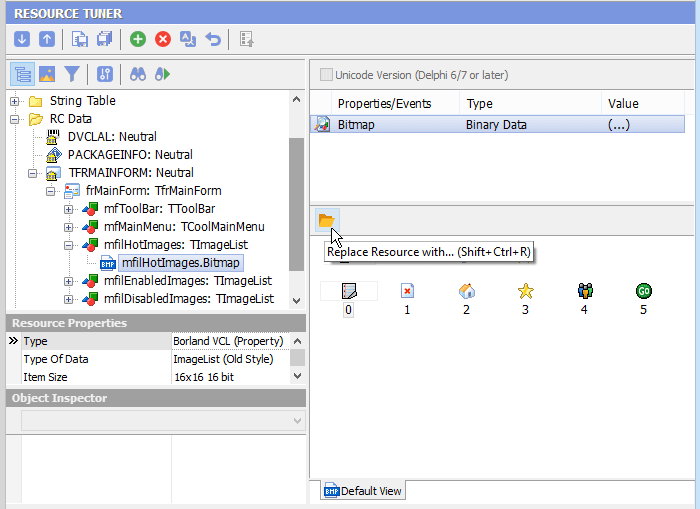
Navigate easily through the Delphi forms, RCData, and objects, and view their contents (Image Lists, Strings List, Glyphs, Bitmaps). There's a very strong emphasis on peeking inside Delphi applications and packages.
Resource Editor
Depending on the resource type, Resource Tuner automatically starts the appropriate editor mode: Graphics, Media, Dialog, Menu, Accelerators, Version Information, Delphi Form (DFM), or Text. The dialog boxes, available options, and menu commands also varies depending on the resource type. That will allow you to view and edit resources in the most convenient and intuitive way.
Resource Tuner supports viewing, adding and replacing large (256x256px) icons stored as PNGs.
When editing dialogs, you will see a preview of what the dialog box looks like. To view the decompiled script behind the dialog box in either text or hex format, choose the Script View or Hex View tab.
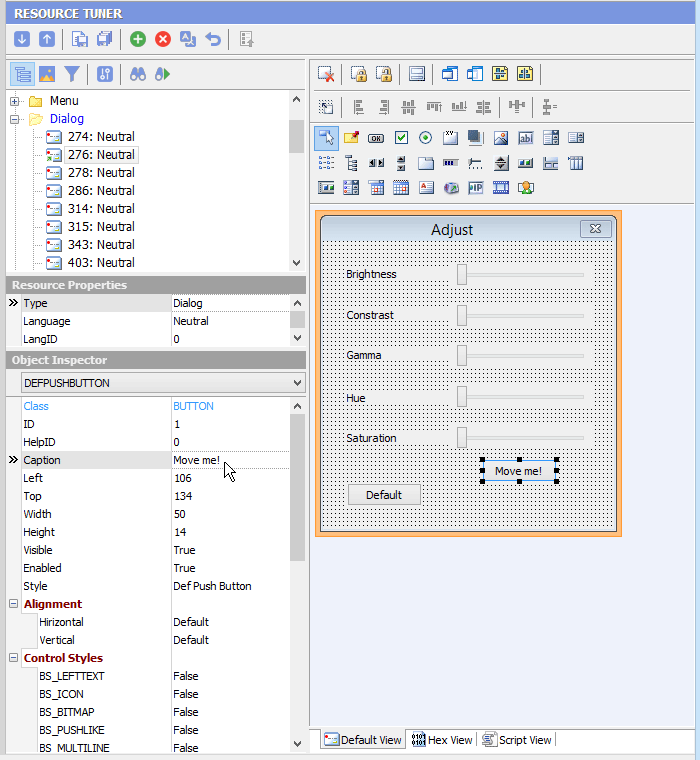
Any changes made can be restored before exiting Resource Tuner by using the 'Restore Resource Data' ![]() button.
button.
Resource Extraction
The Resource File Scanner is an easy way to scan the directories and drives on your computer and extract all it finds inside the executable files in any directory of your choice. Use the left side navigation pane to switch to the File Scanner.
To initiate scanning, first specify the search locations by clicking the Scanner Settings button ![]() or using Ctrl+F. Once configured, start scanning by clicking the Start Scan button
or using Ctrl+F. Once configured, start scanning by clicking the Start Scan button ![]() or pressing F9.
or pressing F9.
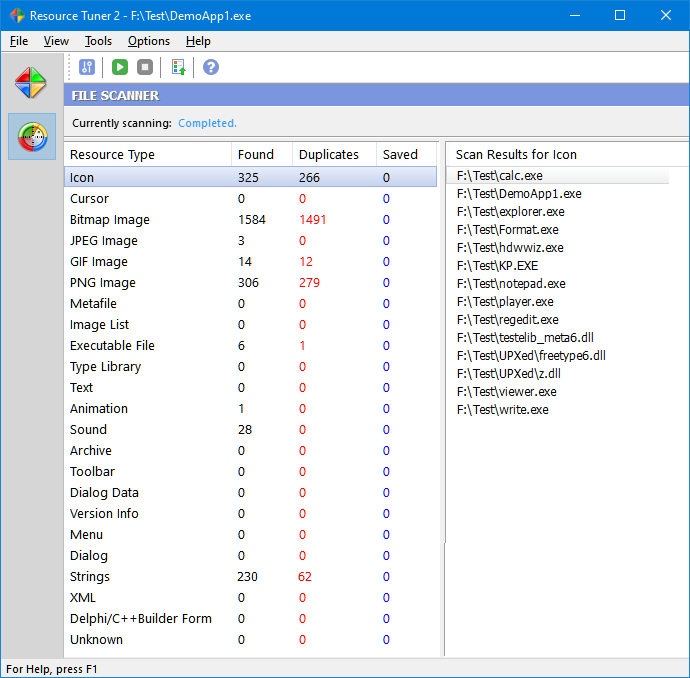
You selectively choose what items stored in the resources will appear in the search result view. A wizard-based process guides you through several filter options and other properties, with the result then shown in categories, and the option to load them in the Resource Editor.
Application Manifest Wizard
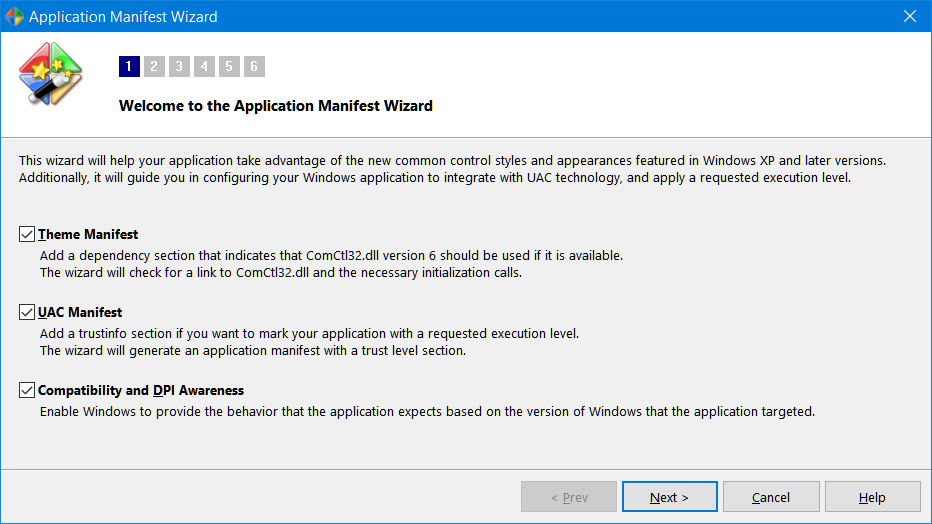
The Manifest Wizard helps you insert an application manifest into the resource section. It also will let you specially configure your Pre-Vista application to work with newer Windows versions, and mark it with a requested execution level.
Log Pane
The bottom section of the Resource Tuner GUI features an activity log window. This log window captures commands and messages, providing real-time updates about ongoing actions. Whenever a task is performed through the GUI, the corresponding result is logged. Additionally, the log captures warnings and error messages that arise during the execution of tasks.

Customization Options
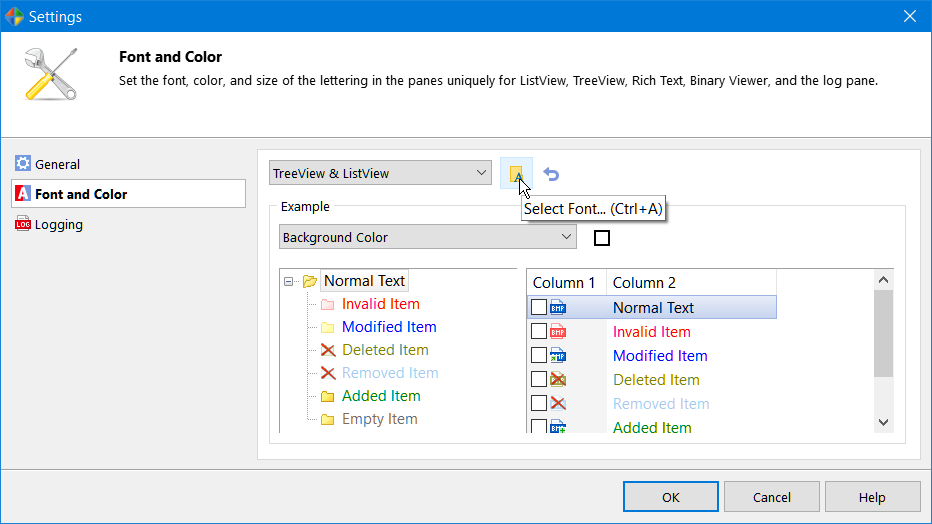
Selecting Settings from the Tools menu will display the Customization dialog. This displays a dialog box having three tabs, where you can customize the general, view, and logging settings. Clicking on any tab will show the page of choices connected to that tab.
We Offer A Free Trial: Try The Software, Risk Free.

Resource Tuner runs on all versions of Windows, including 11, 10, 8, 7, and XP, and supports both 32-bit and 64-bit systems.
